
The Question Every Homeowner With a Textured Wall Asks
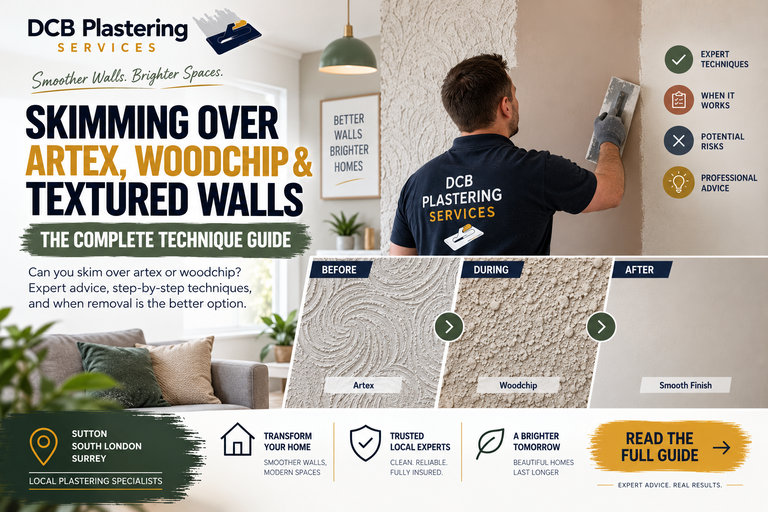
"Can you just skim over it?" It's the first question homeowners ask when facing an artex ceiling, woodchip-papered wall, or any heavily textured surface left behind by a previous owner. The honest answer is: sometimes, but not always — and knowing the difference prevents a costly mistake.
This guide walks through exactly when skimming over an existing textured surface is a legitimate technique, when it isn't, and what the process actually involves.
Skimming Over Artex: When It's Viable
The Bonding Coat Approach
Skimming directly over sound, well-adhered artex is a genuine, widely used technique — provided the surface is properly prepared first. The process typically involves:
- PVA bonding coat or specialist plaster bonding agent applied to the artex surface, sealing it and providing a key for new plaster to grip
- Skim coat application over the bonded surface, typically 2-3mm
- Careful attention to texture depth — heavily raised artex patterns (swirls, stipple) may need light abrading first to reduce peaks, or a thicker skim application to fully bury the texture
When Skimming Over Artex Works Well
- The artex is firmly bonded to the substrate with no hollow-sounding areas when tapped
- The texture pattern is relatively flat or lightly textured (not deeply swirled or raised)
- There's no underlying damp, cracking, or structural movement
- The ceiling or wall has not been identified as containing asbestos — see below
When Skimming Over Artex Doesn't Work
- Asbestos-containing artex (pre-1999) should never be skimmed over as a way to "hide" the problem. Disturbing it during preparation (abrading, hacking off loose sections) risks fibre release, and skimming over doesn't eliminate the underlying hazard for future owners or future renovation work. Full details on safe assessment are covered in our artex removal and ceiling modernisation guide.
- Heavily raised or deep swirl patterns — attempting to bury very deep texture under a thin skim coat often results in "ghosting," where the pattern remains faintly visible once painted, especially under certain lighting
- Artex showing signs of previous water damage — if the artex has softened, sagged, or shows staining, the underlying issue must be resolved first (removal is usually unavoidable at this point)
- Cracked or loose sections — any hollow-sounding or loose artex must be removed and made good before skimming; skimming over loose material guarantees future failure
Skimming Over Woodchip Wallpaper: A Different Problem Entirely
Woodchip wallpaper — small wood particles embedded in the paper for a textured effect, popular from the 1970s through the 1990s — presents different challenges to artex.
Why Woodchip Is Rarely Suitable to Skim Over Directly
Unlike artex (a plaster-based product), woodchip is paper. Skimming directly over wallpaper is not recommended practice, because:
- Paper adhesion is unreliable — wallpaper paste bonds can fail under the weight and moisture of wet plaster, causing the paper (and the new skim coat with it) to peel away from the wall
- Moisture from wet plaster can reactivate old wallpaper paste, causing bubbling or lifting beneath the new skim coat
- Uneven texture telegraphs through — woodchip's random raised texture is harder to fully disguise than artex's more uniform pattern
The Correct Process for Woodchip Walls
- Full wallpaper removal — steaming or soaking to soften adhesive, then careful stripping back to bare plaster or plasterboard
- Wall assessment — checking the substrate underneath for cracks, damage, or unevenness once exposed
- Making good — filling any damage revealed once the woodchip is removed
- Standard skim coat application to the prepared, bare substrate
While this takes longer than a direct skim-over, it produces a genuinely reliable, long-lasting finish — versus the significant risk of peeling or bubbling from skimming directly onto old wallpaper.
Skimming Over Other Textured Surfaces
Textured (Stippled) Paint Finishes
Similar principles to artex apply — if firmly bonded and relatively flat, a bonding coat followed by skim is often viable. Heavily stippled or "orange peel" textured paint may need light sanding first to reduce peak height.
Old Lath and Plaster Walls (Period Properties)
Common in Victorian and Edwardian properties. If sound and well-adhered, a skim coat can refresh the surface. However, period properties often have specific heritage considerations — modern gypsum skim over old lime plaster can trap moisture if the wall isn't breathable, so assessment of the existing plaster type matters before deciding on the approach.
Exposed Blockwork or Uneven Brick
Not a "skim over" situation — these substrates typically need a bonding/browning base coat first to build up an even surface before a finish skim coat, rather than direct skimming.
How to Assess Your Wall or Ceiling Before Deciding
The Tap Test
Gently tap across the surface with your knuckles. A solid, consistent sound indicates good adhesion. A hollow or dull "thud" indicates the surface (or sections of it) has debonded from the substrate beneath — these areas need to be removed and made good, not skimmed over.
The Visual Inspection
Look closely for:
- Cracking (particularly around joints, corners, or ceiling roses)
- Staining (indicates current or historic water ingress — resolve the source before any plastering work)
- Sagging (particularly on ceilings — indicates the material has absorbed moisture and lost structural integrity)
- Loose or flaking sections
The Age and Composition Question
If your property was built or last decorated before 1999 and has an artex-type textured ceiling, professional asbestos testing should always happen before any preparation work begins — abrading, hacking off, or even light sanding of asbestos-containing material carries genuine health risk. See our complete artex and asbestos guide for the correct testing process.
Skim Over vs Full Removal: Decision Comparison
| Factor | Skim Over (Viable Cases) | Full Removal Required |
| Surface condition | Firmly bonded, no hollow sounds | Loose, hollow, or debonded areas |
| Texture depth | Flat to lightly textured | Heavily raised, deep swirl patterns |
| Water damage history | None | Any staining, sagging, or softening |
| Asbestos status | Confirmed asbestos-free | Unconfirmed or confirmed presence (pre-1999) |
| Material type | Plaster-based (artex, textured paint) | Paper-based (woodchip wallpaper) |
| Underlying condition | Sound substrate beneath | Cracking, damp, or structural concern |
| Long-term reliability | Good, if properly bonded | N/A — removal is the reliable path |
Common Mistakes Homeowners Make With Textured Surfaces
Mistake 1: Skimming over hollow-sounding artex to save time. This guarantees the new skim coat will crack and eventually fail as the underlying material continues to debond.
Mistake 2: Attempting to skim directly over wallpaper (including woodchip) to avoid stripping. The moisture in wet plaster very often reactivates old adhesive, causing bubbling and peeling weeks or months later — a much more disruptive repair than proper preparation would have been.
Mistake 3: Painting over damp-stained artex or plaster without addressing the water source first. Any surface treatment — skim, paint, or otherwise — will fail again if the underlying moisture problem isn't resolved. See our damp plaster repair guide for diagnosing the source.
Mistake 4: DIY abrading or sanding of pre-1999 artex without testing. This is the single highest-risk DIY mistake on textured ceilings — creating airborne dust from potentially asbestos-containing material.
Mistake 5: Assuming all rooms in the property have the same wall composition. Different rooms — particularly if renovated at different times by previous owners — can have entirely different substrates (lath and plaster in one room, modern plasterboard in another). Each surface needs individual assessment.
Case Study: Woodchip Removal Uncovering Hidden Cracking (Sutton)
A Sutton homeowner asked us to skim directly over 1980s woodchip wallpaper to save time. On assessment, the tap test revealed loose plaster beneath in two areas, invisible under the paper. We stripped the woodchip fully, found and repaired hairline cracking around a window reveal, then applied a standard skim coat. Skimming directly over the paper would have masked — not fixed — the underlying issue, guaranteeing failure within months.
What a Professional Assessment Actually Involves
When DCB Plastering assesses a textured ceiling or wall for a skim-over versus removal decision, the process includes:
- Full tap test survey across the entire surface, mapping any hollow or loose areas
- Age and material identification — confirming whether professional asbestos testing is required first
- Moisture and damp assessment — checking for any current or historic water ingress
- Texture depth evaluation — determining whether a bonding coat and skim will adequately disguise the pattern, or whether ghosting is likely
- Written recommendation — skim-over or removal, with reasoning, before any work begins
This assessment-first approach avoids starting work on the wrong technique and discovering problems halfway through.
Frequently Asked Questions
Q: Is it cheaper to skim over artex than remove it? A: It's often a faster process, but "cheaper" depends entirely on whether the surface is genuinely suitable. Skimming over unsuitable artex (hollow-sounding, heavily textured, or asbestos-containing) leads to failure and the need for removal anyway — meaning the work gets paid for twice.
Q: Can I skim over artex myself as a DIY project? A: Bonding and skimming technique requires genuine trowel skill to achieve a smooth, professional finish, and — critically — correctly assessing whether the artex is asbestos-containing and safe to prepare requires professional testing, not visual guesswork.
Q: How do I know if my woodchip wallpaper needs steaming or can be dry-stripped? A: This depends on the adhesive type and how many layers of paint/paper are present. A professional assessment on-site determines the fastest, least damaging removal method for your specific wall.
Q: Will skimming over artex hide the texture completely? A: If the artex is relatively flat and properly bonded, yes — a correctly applied skim coat should fully disguise it. Deeply swirled or raised patterns carry a genuine risk of "ghosting" through the new surface, which is why assessment before starting matters.
Q: What's the difference between a bonding coat and PVA for preparing artex? A: PVA (diluted) provides basic sealing and a light key for adhesion on relatively sound surfaces. A specialist plaster bonding agent provides a stronger, more reliable mechanical key, generally recommended for textured or slightly uncertain surfaces to maximise adhesion of the new skim coat.
Key Takeaways
- Skimming over artex can work — but only on firmly bonded, relatively flat, confirmed asbestos-free surfaces
- Woodchip wallpaper should almost always be fully removed, not skimmed over — paper adhesion is unreliable under wet plaster
- The tap test (checking for hollow sounds) is the essential first assessment step
- Never prepare or abrade pre-1999 textured ceilings without asbestos testing first
- Water damage or staining must be resolved at the source before any skim or repair work
- Professional assessment before starting prevents paying for the wrong technique twice
Unsure whether your textured ceiling or wall is a skim-over or full removal job? DCB Plastering Services provides a full on-site assessment across Sutton, South London, and Surrey before any work begins. 35 years of experience getting this decision right the first time.